
Stripe: Online payment processing
- Simple: Set up your account once and start receiving payments immediately.
- Low cost: Stripe only charges a flat fee of 2.9% + $0.30 per transaction for all major credit cards, including American Express.
- Reduce web costs: Web development hourly costs are greatly reduced by the ease of Stripe programming.
- Easy to use: Stripe is easy to integrate into your website and simple for clients to use.
- Security: Stripe keeps sensitive information safe and steers you clear of the difficulties of becoming PCI compliant. Any business looking to accept online payments and store credit card information, faces a daunting task. If the business does not comply, your business risks a hefty fine and runs the risk of being hacked. PCI compliance requires a business to secure many channels, such as a secure web host, compliant shopping cart, train staff and secure passwords, add firewalls and update software on all your routers and computers. Stripe makes this easy, since credit card information is securely transmitted and sensitive information securely stored on Stripe’s servers. Stripe keeps payment information safe with the most rigorous level of PCI Service Provider security. Also, two factor authentication allows an extra layer of security.
- Customizable: Stripe can be personalized for your business to offer subscriptions, discounts and price levels.
- Worldwide payments: Stripe accepts payments from US, Canada, UK, Australia and many European countries.
Let’s get started…
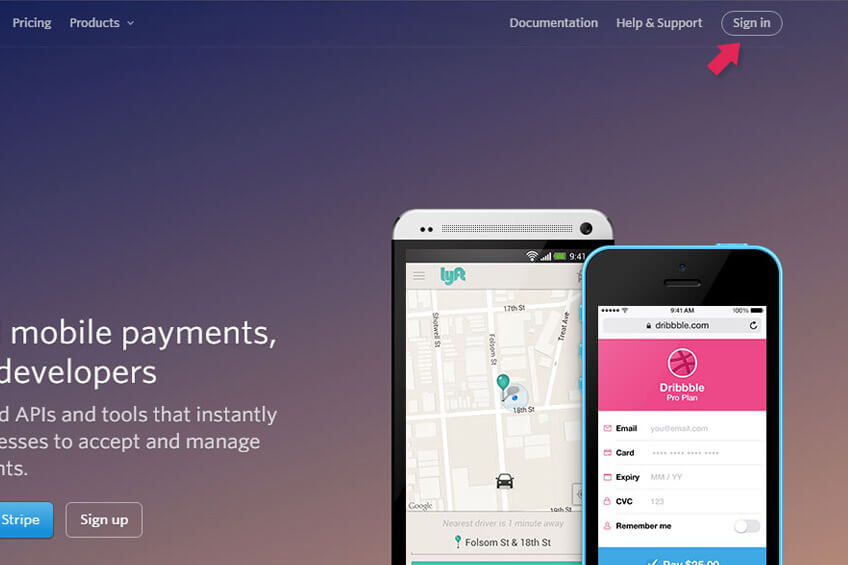
1. Visit stripe.com to create a new account. Click the “Sign In” button located in the right hand corner to get started with your new account.
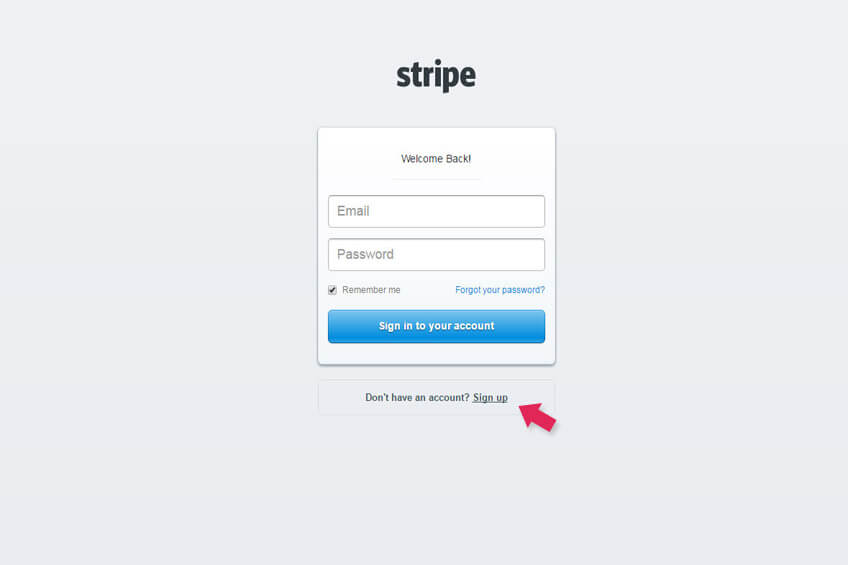
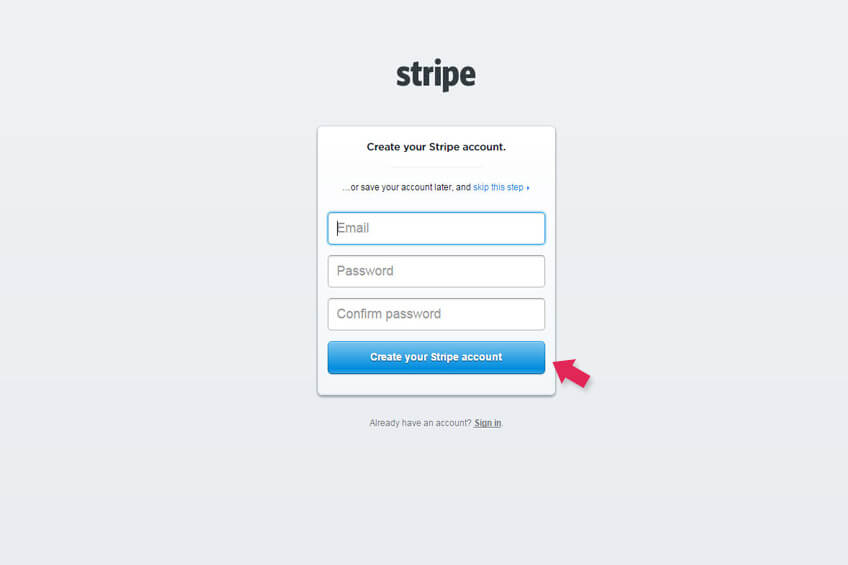
2. Sign up for a new account by clicking on the link “Don’t have an account? Sign up”– Begin to create your account with your email address. Remember to choose a password that is at least 8 characters long.
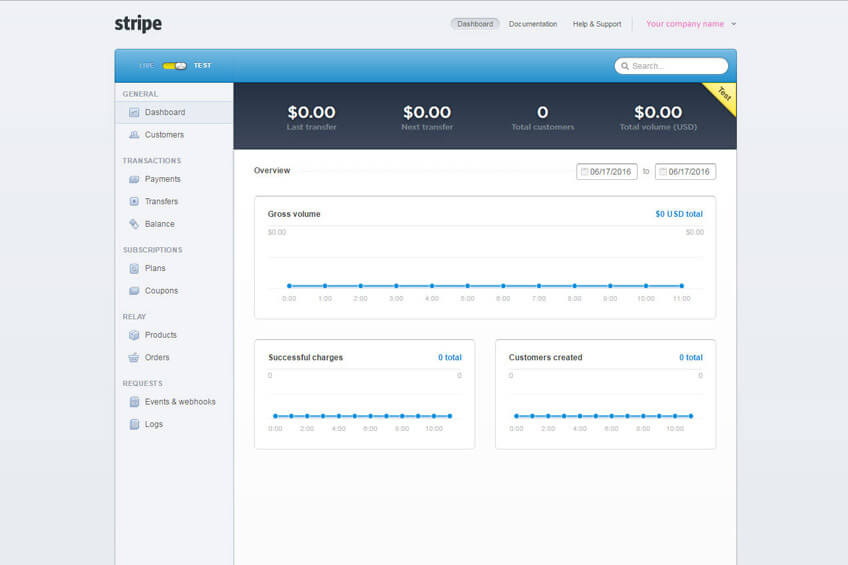
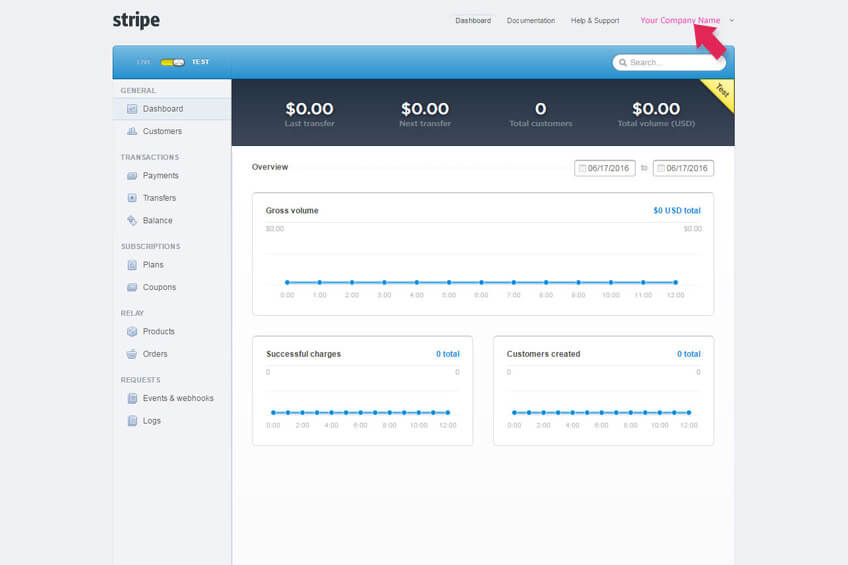
3. Once you log in, your Stripe dashboard will open up.
4. Check your email! Stripe will send a verification email to the email address that you chose. Click the link in the message to confirm your email address.
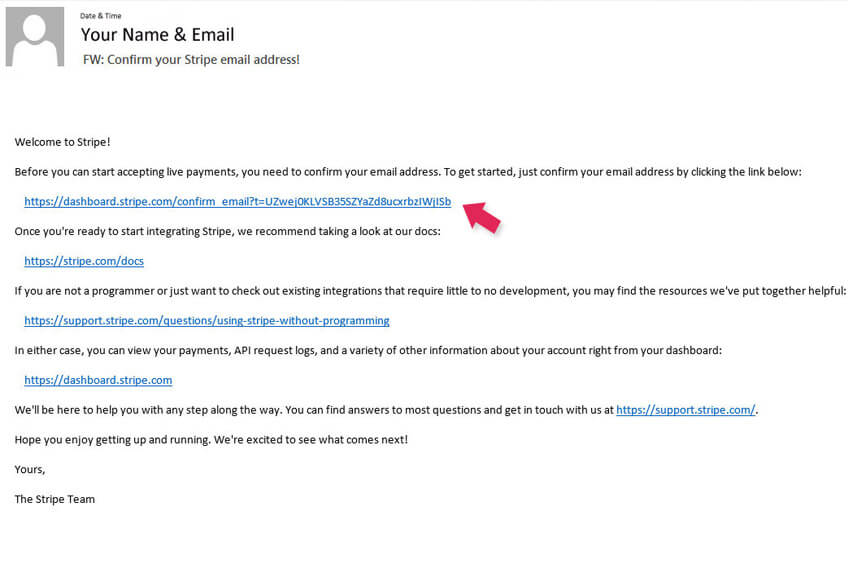
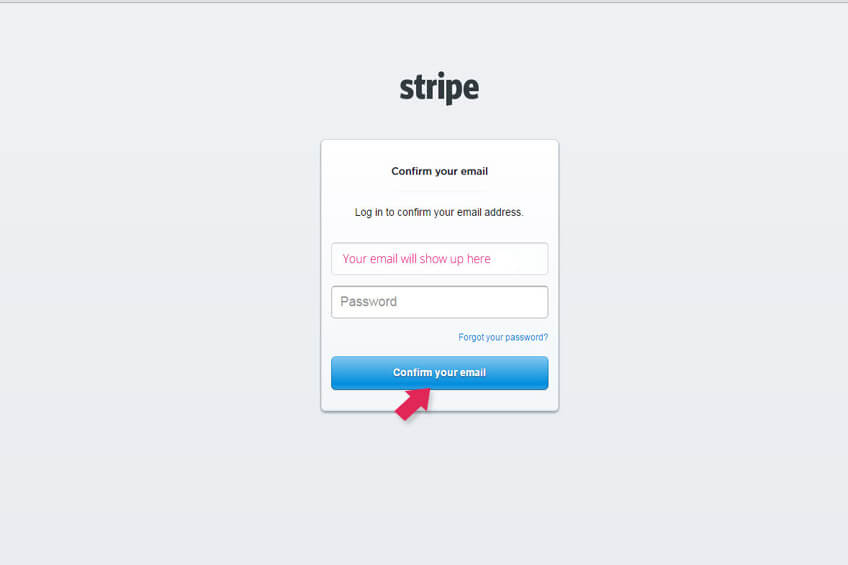
5. This link will direct you to the Stripe website, where you will prompted to input your password. Add your password & click on “confirm your email”.
6. Your Stripe dashboard will open up. Look for your company name in the top right hand corner.
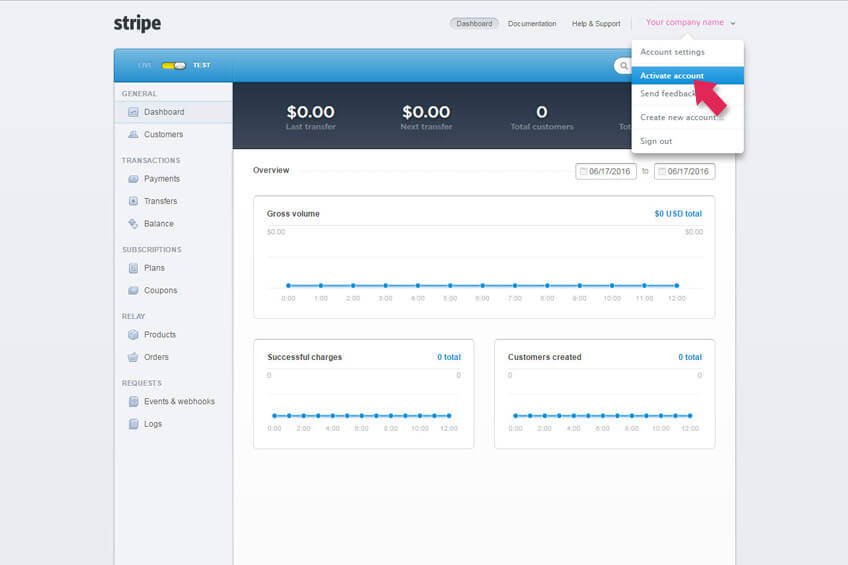
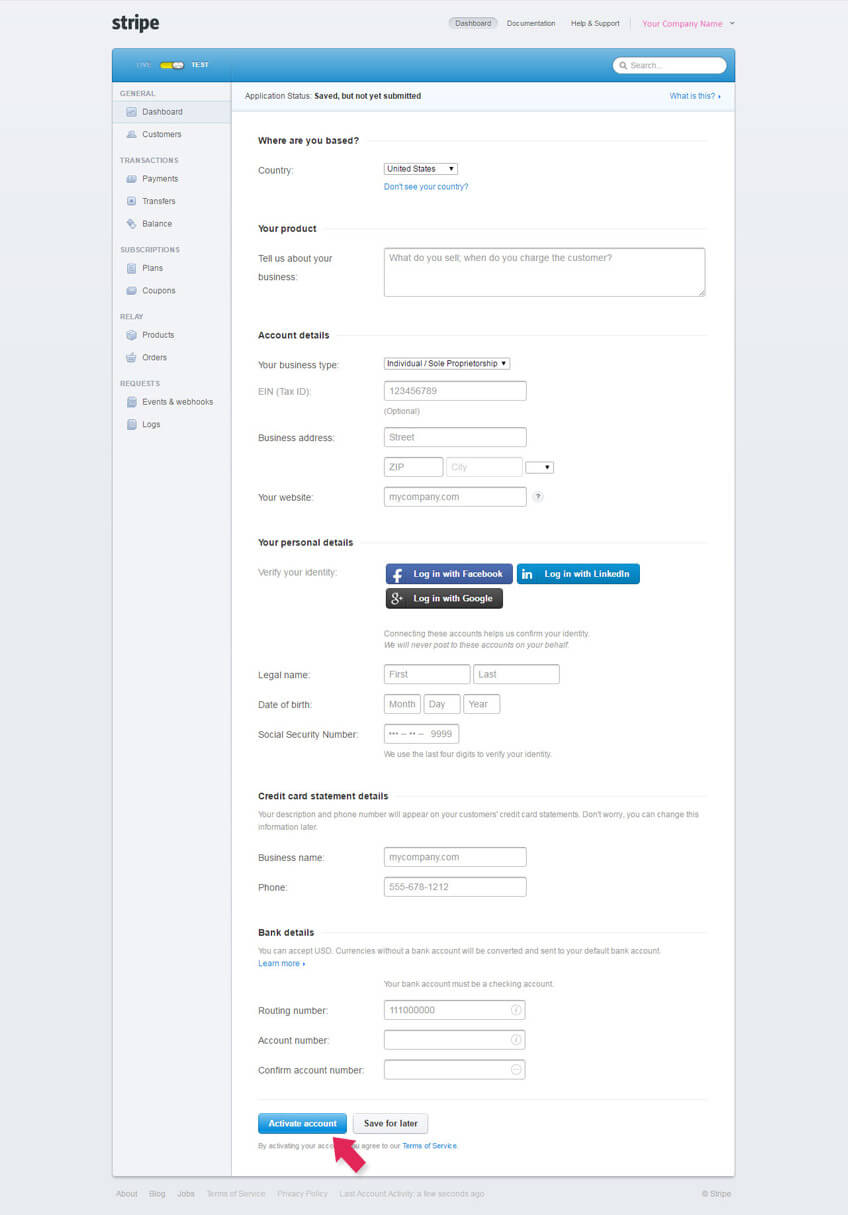
7. Click on the arrow next to your company name. Find and click on “Activate Account” under your company name.
8. Fill out your company information, personal details & bank information. Confirm that all your information is correct and click on “Activate Account” to start collecting payments!
Leave a Reply